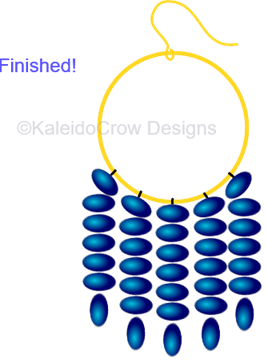
This is a free tutorial; I have taught this as a class a couple of times and this is the material I created to hand out. I decided to make it available for free here on my website.
The example pictures only show a 6-bead fringe but that is just for illustration - here are a couple of simple 3-color fringe patterns I drew up so that you can have something to practice with. You don’t even have to use the same colors! :-)


Supplies Needed:
1 wingspan of thread per earring – something flexible like Nymo or Toho One-G. Fireline or Wildfire are too stiff for fringe.
Seed Beads – your pattern will show the amount you need
Metal Component Shape – Circle, Square, Triangle, Hexagon. Here is an example from Amazon but they don’t have to be these exact ones. Also these can be found from many other sources as well.
2 ear wires
2 jump rings (optional)
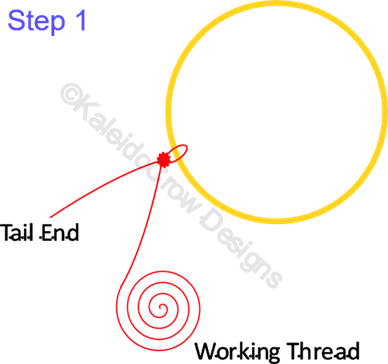
Directions:
1. Measure and cut 1 wingspan of thread, going from your fingertips on one hand to the other across your shoulders/collarbone. Thread your needle. Tie the thread with a secure knot (e.g. double overhand) onto the metal shape, leaving a tail of 4 to 6 inches.
2. Pick up 2 beads on your needle and move them down the thread until they are right next to the metal shape.
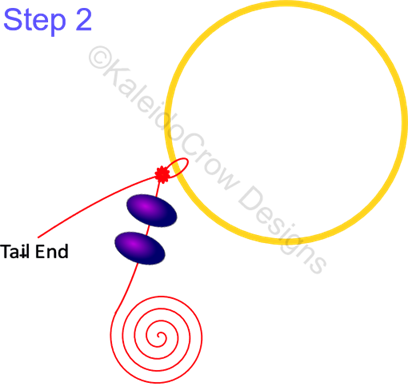
3. Go under/through the metal shape so that your thread is looped around it and go back through the 2nd bead.
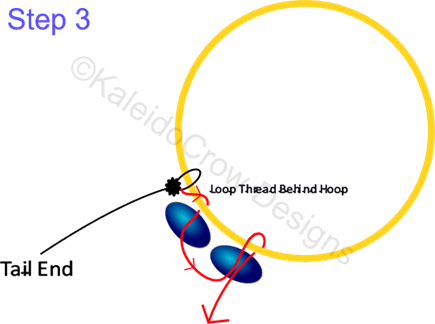
4. Pick up 1 new bead and move it down the thread next to the other beads.
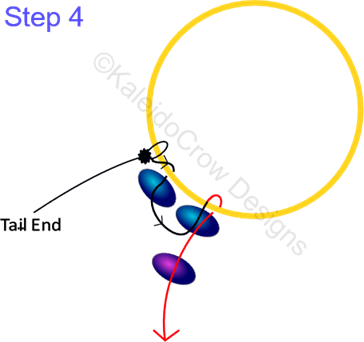
5. Go back up through the bead, making sure the thread is looped around the metal shape.
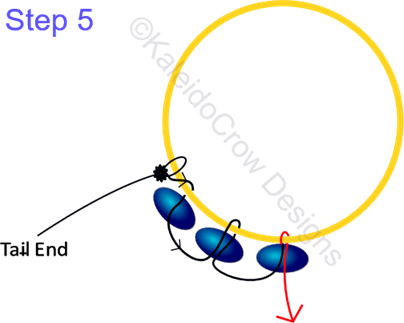
6. Repeat step 5 until your foundation row is complete.
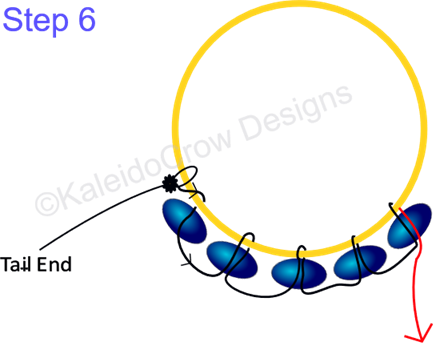
7. You can now start making the fringe. Pick up all the beads for that row onto the thread.
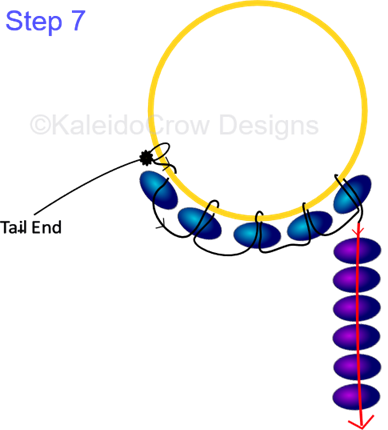
8. Then, go back up through the beads (skipping the bottom bead so that it is perpendicular to the bead before it). Once you reach the top of the fringe, go back up through the foundation bead.
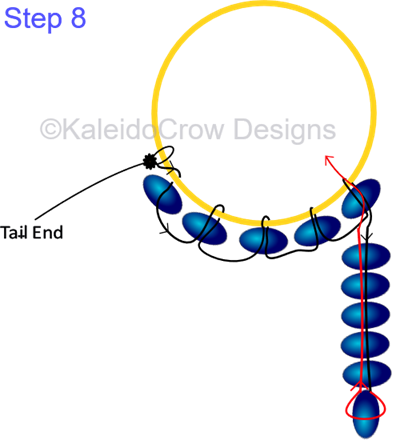
9. Next, back down through the same bead, and then over to and back through the next foundation bead.
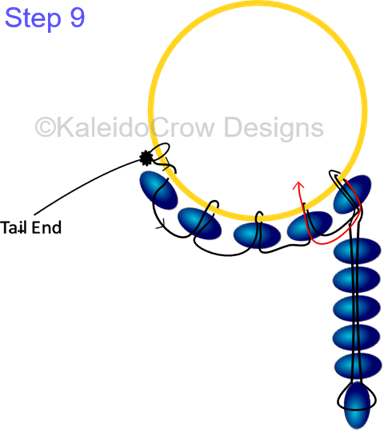
10. Then, you will back down through that bead. You want the thread coming out of the same row’s foundation bead before making the fringe.
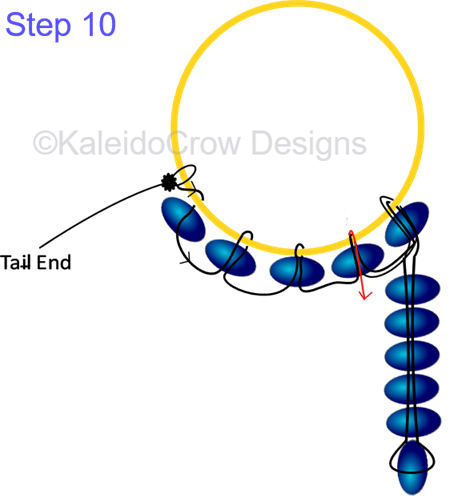
11. Now, repeat steps 7 through 10 for each row until all foundation beads have a row of fringe attached to them.
12. When all rows of fringe are on, run the thread ends through the first and second row of fringe about halfway down and clip the extra thread.
13. Add the ear hook and jump ring if desired to the top of the form and you are done!